Yearly Archives: 2012
Goat LUV
Today we have a 4H Goat Project meeting… so I thought with St. Valentine’s Day right around the corner, I’d bake ‘n share a little goat love!
I use a family favorite: Brown Sugar Cookies (originally from my MIL).
HOW-TO:
1/2 cup Crisco veg shortening, 1/2 cup softened margarine, 2 cups dark brown sugar. CREAM together. Add 3 eggs – one at a time – and beat well. Sift dry ingredients: about 5 cups flour, 1 tsp baking powder, 1/2 tsp salt and add to butter/sugar mixture. In another small bowl, add 1 tsp baking soda, 1 Tablespoon boiling water and 1 – 2 drops of a.c. vinegar. Finally, add this to wet mixture along with 1 tsp vanilla.
OPTIONAL: I’ve added 1/4 cup cocoa powder with dash of pepper to this batch. Cinnamon/ginger also is very nice. HINT: This cookie recipe is also nice when making ice cream sandwiches.
Roll out on floured board; cut into shapes & decorate w/sugar sprinkles, (or ice after baking & cooled) as desired. Bake at 350 degree F for approx 10 – 12 minutes. Cool on wire rack. YOU COULD LET THE KIDS DECORATE/PERSONALIZE THEIR OWN COOKIE!
My hubby likes ’em cuz they’re good dunkers!
YUM! I found my goat-shaped cookie cutter here.
Enjoy!
Salute to FIBER GOATS!
It’s about time I paid a little attention to all my WOOLY friends and fiber goats…
Hmmm…
…or is it… to my friends and their WOOLY goats??
Either way… I love my friends, my friends with WOOLY goats and my WOOLY goat friends! I think that about covers it.
…two are better than one.
The more, the merrier!
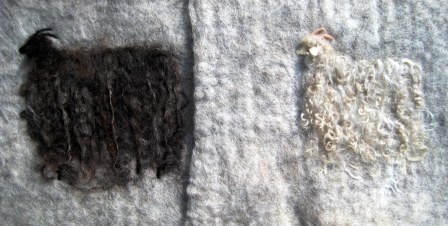
Black mohair on silver/gray Shetland.
I wet-felted the natural black mohair right onto the Shetland, and then top-dressed with a few staples of additional mohair.
I used the same technique with the white goat… a little disappointed. There isn’t as much contrast between the white Pygora and silver Shetland. Would have been better to have a darker background for contrast.
Yes, I used my Brutus, Pygora (Type B) raw staples. They’re lovely and lustrous.
But, my hubby said it’s like looking for a polar bear in a snow storm! Geeeesh! What do guys know????
Happy fiber’n… with GOATS too!!!!
Wet-Felting 101, Re-Visited
My very first fiber art project ~~ with anything WOOL-y ~~ was making FELT. That was about 15-years ago. I owned a small flock of Shetland sheep and had a lot of wool fleece. I knew that with little, if any, additional investment, I could produce FELT! I signed-up for a wet-felting workshop at a local fiber festival… and the rest is history! I ♥ wet-felting!!
I’ve provided numerous wet-felting How-To’s, so this will be a quickie refresher. Think of it as ME dangling a carrot! Perhaps it will provide you with a little incentive to express your creativity with wet-felting… good, clean, FUN!
Most of my ‘smaller’ felt-making projects occur in the kitchen (larger projects in the bath tub or outdoors during summer months).
WARNING: Beware of cats who love wool!!!!
Begin with arranging/building thin layers of wool – alternating direction with each subsequent layer. First layer with the fibers aligned north and south; next layer east and west, third layer north and south…and so on… until you arrive at the desired thickness. Take your time. Thin spots will result in ‘holes’ in your felt.
You may add natural & colored wool, wool fleece staples, yarn, sparkles… and so on… for texture and interest ~ to make your wool felt masterpiece one-of-a-kind! BTW, this is felting in the flat. To make fabric. There’s also resist/seamless felting to make 3-D bowls/vessels etc.
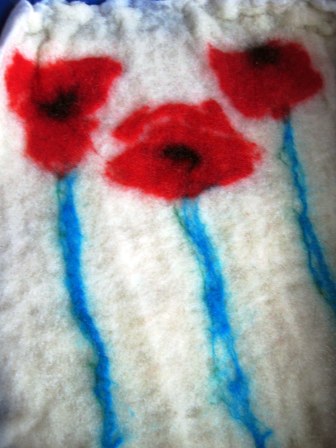
Today, I’m making Spring-tyme poppies.
Once you’re satisfied with your design, mix a pitcher of hot water with a squirt of Dawn dish soap and gently wet your project. HINT: Beginners will often enclose their piece in a cotton or mesh envelope to keep it ‘together’ until it begins to felt. With the heel/palm of your hands, gently work the fiber as if you’re kneading dough.
Then, a bit more aggressively with a bamboo or matchstick mat. HINT: Bubble wrap works well too.
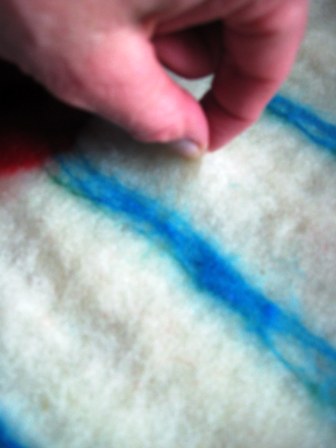
Check the progress of your felting with the pinch test. If the layers separate, keep working, agitating, replacing hot water. Add a little more friction to aid in ‘fulling’.
Rinse and towel blot dry. Shape/block lightly and allow to air dry! Or, toss in the dryer for added effect.
Viola! Felt (that’s felted soap in the right bottom corner).
The beauty of felt… no two pieces are exactly alike!
You know I had to make a sheep somewhere…
After several layers of natural fleece, I added my colored fleece ~ free style ~ on the top layer.
Fast forward… fulled sheep!
Happy fiber’n!
recycle. reuse.
I ♥ these!
I love these colorful Beneful dog food plastic containers. So, I had a coupon and purchased a few containers (for a ‘treat’ for my dogs & barn cats).
I think they’ll make nice (and pretty) storage containers, individual soap molds, give-away goat cheese containers…
I know… call me goofy!!!
Fiber ART.
Share the love.
A quickie little project to decorate your home with love this Valentine’s Day.
I made this wee little heart pennant bunting to grace my light over the kitchen table. I’m nutz about this ‘holiday’.
How-To:
I cut little pennants from an old book page… a romance novel to be exact (hee hee). You could use ANY decorative paper, gift wrap, tissue paper – even colorful fabric scraps! Then, I used a heart punch to cut-out little hearts into each paper pennant (this may be difficult w/fabric). Next, I used a decorative tape (have you seen the large assortment in the crafts store scrapbook section?) to secure each paper pennant to a bit of baker’s twine – or yarn, or string… whatever you have on hand. You could also use a dab of glue. The idea is no fuss! Keep in mind, the scale of your project when you choose your twine.
Last, I added a quick brush-stroke of water color ( I ♥ water color paint) to ‘pretty’ the pennants. Ta Da! Perhaps you can get the kids involved to help!
This would be sweet to send to a friend in a love-note (via old-fashioned snail mail) to brighten their day… don’t you think?
Happy Sunday!
It’s never easy…
It’s NEVER easy to say goodbye to a dear friend.
Farm life – the good, the bad and the ugly!
My daughter lost her best friend today, her sweet horse ‘ACoolCat’. A most difficult lesson for a 17-year old. We’re no stranger to death and loss on a farm. It never gets easier. It’s painful. It hurts. There’s no rhyme nor reason. There’s no words to console. Our only comfort is the sweet memory of the too short life we shared. I like to believe Cat’s running in open green pastures, along with all our barnyard ‘pets’ who have gone before him!
We’ll truly miss you big guy! Let ’em buck!!
P.S. Many have inquired re the cause of Cat’s death. He was well and thriving – a super-charged youngster, only five. We believe he may have suffered a tummy ache (colic) and ‘rolled’ to relieve the ache…suffered a ‘twisted gut’ and died within 24-hours… despite our best efforts.
Not my usual style?
Well, not my ‘usual’ sheepy project, that is.
I call it my ‘Flock of Sheep’ pillow; much more abstract work than usual.
I wet-felted and needle felted his project using five different wool sheep breeds – to add dimension and texture. The finished pillow measures approx 11 X 11 – inches.
And since I’m on the topic of sheep, I finished a little fun & fuzzy red satchel, just big enough for a cell phone, iPod, camera perhaps?
A little red satchel for St. Valentine’s Day…
Leather lace strap, eyelash novelty yarn and a couple pink heart beads just for grins. 🙂
I’m still obsessed with stringing red hearts and sheepy banners all over the house… sheesh! Hopeless.
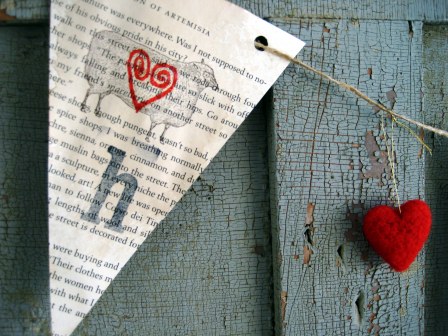
I tea stained book pages, stamped them with a sheep rubber stamp and a heart stamp (in red). Outlined the heart with red glitter and stamped the letters h-e-a-r-t onto each pennant. I added a few red needle felted hearts on one banner and sweet little red crocheted hearts on another.
I went a bit nutz!
Adjustable heart crochet pattern:
Chain 2.
1 Round: Work 9 double crochets into the adjustable circle. Chain 2. Do not join to first chain 2 stitches.
Slip stitch into the circle to finish round. Bind off. Pull the circle (heart) closed with the loose end.
Tie the loose ends together in a simple knot. Sew-in ends.
That’s all there is to it!
Beavers, woodchuck, vermin…?
To the un-trained eye, it may appear as ‘rodent’ activity…. what’s left of my poor Christmas tree!
But, upon closer inspection… we can identify the felonious perpetrator(s).
Goats L.O.V.E. (chemical-free) pine trees…
My goaties often ‘help’ with the barnyard chores…
…and don’t mind a nibble here and there along the way.
How can you say ‘NO’ to that mug???


