What’s a staddle stone?

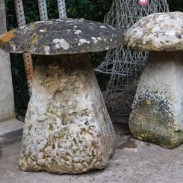
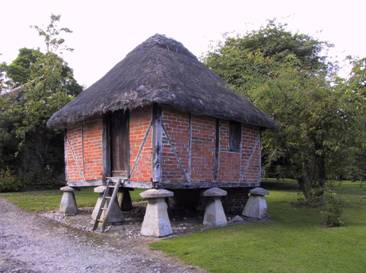
Staddle stones (also known as mushroom stones) were originally used as supporting bases to raise tithe barns, hayricks, game larders and granaries off the ground. The staddle stones lifted the granaries above the ground thereby protecting the stored grain from spoilage by dampness/water seepage and also from mice and other vermin as they couldn’t climb past the staddle stone caps. In Middle English staddle or stadle is stathel, from Old English stathol, a foundation, support or trunk of a tree.

Photo: Antique English Staddle Stones at Detroit Garden Works

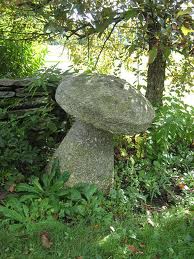
Virtually unchanged in design for many hundreds of years, staddle stones come in various types of stone (depending on what was available in the landscape) and wood with slight variations of form. They are extremely popular as garden ornaments especially in rural areas. The name has become integrated into the landscape with bridges, houses, farms and other structures incorporating the name ‘staddle’. The staddle stones usually had a separate head and base which gave the whole structure a mushroom-like appearance. The base varied from cylindrical to tapered rectangular to near triangular.

Photo credit: Sheldon Manor

The tops of the staddles were usually circular which made it almost impossible for a rodent to climb up and into the hay or grain stored above. The air could freely circulate beneath the stored crops and this helped to keep it dry. A wood framework was placed onto the tops of the stones, the staddles being arranged in two or three rows, giving sixteen or more stones. The barns, granaries, etc. were built on top of this frame.

Additional uses: Bee hives were often set on top of staddle stones to keep out predators and provide dry and airy conditions. Small roofed box-shaped larders supported by small staddle stones were used on large estates for storage of game, such as pheasant, brought back by shooting parties. Lastly, surveyors often used staddle stones inserted into the ground to identify property boundaries.

Today, staddles are often found in architectural salvage yards as attractive garden/landscape structures. Century old staddle stones have developed a lichen ‘patina’ with slow and fast growing species adhering to the surfaces adding to the biodiversity of a garden! Staddles are also sold new made from molded concrete or wood ‘cut’ with chainsaws to produce wooden ‘staddle stones’ for use as garden seats.

…a wonderful addition to any landscape!

Rams: A Lesson in Tough Love

Why do you suppose a ram, a male sheep, is called a ram?

ram  (rm) n.

1. A male sheep.
2. Any of several devices used to drive, batter, or crush by forceful impact, especially:

a. A battering ram.
b. The weight that drops in a pile driver or steam hammer.
c. The plunger or piston of a force pump or hydraulic press.
3. A hydraulic ram.
They say a picture paints a thousand words…
 
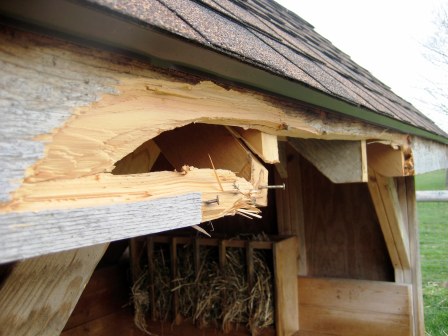
The good news…neither bad boy has ever ‘rammed’ me! The shed roof is almost  5-feet above the ground. I have springy sheep! Grrrrrrr….
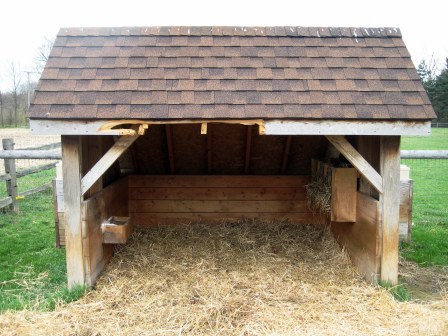
This is my lovely ram’s shed, a snap-shot of recent rams’ destructive PLAY… a display perhaps of boredom?  What else do rams have to do??? In spite of the best of care, their antics never cease to aMu$e me (and my pocketbook). You see, I have two Shetland rams: senior 3-year-old and junior yearling). I love my small flock of Shetland sheep and my rams are no exception. I’m guilty of ALL the sheepy pleasures of ‘things’ that are TABOO and ought NOT be done with rams… even those sweet little ram lambs! I straddle and bounce the lambs across my lap, holding, petting, playing, laying down in the meadow – to encourage trust and ‘friendship’. I know, I’m nutz! (but, I NEVER EVER turn my back on ANY ram).
Handling rams is a potentially dangerous business and it’s best to be prepared and knowledgeable before you engage in such an endeavor. Experience is a great teacher (after you’ve been ‘rammed’ a few times…and live to talk about it), but it also helps to heed the wisdom of professionals and educate yourself beforehand!
An excellent article on the subject of managing rams by Brook & Lois Moore, Stonehaven Farm Shetlands, may be found in the NASSA News (a quarterly newsletter dated Fall, 2011) and provided a few simple RULES of engagement:
  1. Rams, including lambs, must never butt or paw for attention or press their heads against you or push another sheep out of the way for your attention.
  2. A ram must never approach you with his head down, or ‘bob’ his head or back-up to feint a charge.
  3. Jumping up on people is forbidden, no matter how cute and little a ram lamb may be! YIKES!!!
  4. A ram should always move away from you when asked to do so.
  5. Ideally, a ram should not enter the shepherd’s comfort zone unless ‘invited’.
  6. Never pet a ram on the top of his head.
Also, another EXPERT close to home (and my heart) here in Michigan is Letty Klein, owner of Pine Lane Farm Karakuls and co-author of The Shepherd’s Rug. I had the priveledge of meeting Letty (along with co-author, Ann Brown) during a fiber festival in Charlevoix, Michigan during 2006. Letty was kind enough to allow me to  re-print her thoughts about the safe handling of rams here:

Raising Respectful Rams

Originally published in The Shepherd, Vol. 46, No. 2, Feb. 2001, pp 14-15.

Tragically the headline in The Charlotte Observer on November 7, 2000 read, “2 dead after ram attack”. Carl Beaver, 84 years old, and his wife Mary, 80, of China Grove, North Carolina were found 100 feet from the gate inside the pasture. Mary was dead and Carl died the next morning.

The Beavers died after the ram apparently turned on them while they were checking the flock in the pasture. The new 250 pound Suffolk ram was tame enough not to be afraid of people, but became very protective of his dozen ewes during the breeding season. The Beavers were taken by surprise. A neighbor said, “It’s hard to imagine that you can’t defend yourself against a sheep.”

But we all know better, don’t we? After all how many times have we heard, “Never turn your back on a ram”? That big ram that we have shown all summer is now turned in with some ewes to work his magic on our breeding program. His attitude changes, he has a new sense of purpose, an incensed possessiveness. He is not the same animal and we are no longer the friendly pat or handful of feed, but we have become the adversary. You can see it in his eyes and mannerisms. Being tame means he has no fear at all. Whether he’s a massive 400 pound Columbia or a 100 pound tail-wagging Shetland we should be ready, and be on guard. Never, ever trust a ram.

Looking back over the last twenty years of raising a horned breed of sheep, I realize the many mistakes, as well as the successes, we have made in our dealings with rams. Presently we have 7 adult horned rams, all of different, some very rare, bloodlines. Since we sell many replacement breeding rams, we often get the comment “Your rams aren’t very friendly.” My reply is “Good! That’s the way they’re trained.” When I enter the pen with the rams, I want to see their rear-ends walking away from me, not their faces coming toward me. Let’s talk about how best to raise a respectful ram.

Rams need two basic requirements:

  1. Lots of room
  2. Companionship

A ram can do a lot of damage if confined all alone in a small pen. With our very first ram, ‘Red Ram Oliver’ we made that mistake. His home was a small pen with a small adjacent outside lot; he was in sort of a solitary confinement. Red smashed everything. We even gave him an ‘enrichment toy’, a rubber tire suspended from the limb of an overhanging tree. He would hit that tire so hard that it would fly in a big arc, coming around hitting him unceremoniously in the rump. This infuriated him to no end, you could almost see the steam coming from his ears and his eyes flash red. His carcass was finally donated to an ethnic group.

For ten years we had a very large wethered Alpine goat, I called him my ‘ram humblizer’. While being very tame and gentle with us, this old goat was definitely the boss as far as the rams were concerned. He finally met his demise when one of the horned rams got a horn caught in the goat’s collar, choking him to death… another lesson learned.

Raising rams from lambs

Overly assertive or bold ram lambs are identified early and a well placed surprise pail of water in the face will usually do the trick. A firm pinch of the nostrils while roughly lifting his front legs off the ground will thwart the boldness of the young ram who is feeling his oats. We must teach visitors not to touch the young ram’s head, or knock him in the head for “play”, explaining that this teasing can be a trigger for aggression.

Our rams are haltered and lead-broke shortly after weaning. To work rams we run them into a small pen where they can be caught, haltered and tied to a fence for vaccinations, treatments such as de-worming, and to have their feet trimmed. They are not petted or babied. Remember the head rubbing or nibbling at your pant leg are the first signs of burgeoning aggression in the developing ram lamb – not affection. What is cute in a 40 pound lamb is totally dangerous in a 150 pound ram. Those lambs remaining with unacceptable temperaments are sold for meat.

Breeding groups

When the rams are in their breeding groups, fence line feeders are used for feeding, so we never have to enter the pastures. At least one empty pasture separates breeding groups. Or if need be, the separating fence line is covered with a couple of layers of plastic snow fence to reduce visibility between rams. If we need to catch the ram or a member of the group, they are all run into a small pen so we can safely separate the individual.

Co-mingling rams

Come time to remove rams from breeding groups, they are first shorn, then we bring all the rams into a fresh small tight standing-room-only pen for at least 24 hours. Expect much growling, grunting, pushing and shoving. Rams are territorial so these mingling areas should be ones not recently used by any of the rams. Then they are released into a larger area with some nice hay or grass. They will fight until they have reestablished their hierarchy, nothing seems to stop this process. After the period of male bonding they become good buddies again. Our ram pasture has plenty of shade, grass, trees to rub heads on or polish horns and a lean-to shed. Their feeders are close to the fence-line so hay can be tossed easily into the bunk from the outside the fence. I don’t normally grain adult rams, it seems to make them very pushy, or as someone wisely suggested, “Grain feeds testosterone”. Sex and grain can be triggers for aggression. The rams may need some supplementation by the end of a rough winter, a fence-line trough fills the bill. They always have access to fresh loose salt and unfrozen water. Never pen a ram in solitary confinement for punishment – his bad behavior will only get worse.

Here is a delightful story about the Integration of Rams as told by Margaret McEwen-King of Middletown Farm,Scotland, reproduced here with her kind permission.

Several years ago I put our rams back together on New Year’s Day in a small area and to my great distress our best white Shetland ram (lamb) had a coming together with a moorit one and the white one lost a horn. Chatting about this at crook-making class to a retired shepherd (Jim Ballantyne – now sadly deceased) who had spent all his herding days high in the Trossachs of Scotland near Callander, I was told “you didn’t pen them up tight enough”. “But I did. They were so tight they couldn’t take a run at each other – even just a few steps.” Again he responded ” You didn’t pen them tight enough”. A Scottish hill shepherd seldom minces or wastes words. “So how tight do they have to be?” I won’t print his reply verbatim, but it was to the effect that if they could stand up, then they could lie down, and the important thing was that they got each others urine, sweat and everything else intermingled so they all ended up smelling the same. This process was likely to take a couple of days. “Isn’t it a bit cruel?” I got a withering look. “They’ll all be alive and uninjured. It’s cruel if one or more get killed.”

Our pen is about 7 foot 6 inches square and accommodates fifteen to twenty rams, from the smallest Shetland to the big Texels and the giant shambling Polwarth. Two walls, a post and rail fence and lashed hurdles to make up the fourth side. Two buckets of water are placed kitty corner and replenished several times a day. Hay is put in several areas. The smell is awful after a day and a half. We let them out into a bigger enclosed area after about 48 hours to feed at the trough. If anyone starts backing up for a run, back they all go back in the pen. It doesn’t take that long and they’ve sorted themselves out.

Another important point is to integrate all the rams at once. We once made the mistake of bringing back a ram lamb which had been out on loan about a fortnight after the rest had been integrated. Said lamb was quite determined he was number 14 and not 15 in the pecking order and we had to more or less go through the whole thing again.

Seems that the vital thing is that they smell ‘communal’.

Once ‘communalized’, rams truly seem to enjoy being in the company of other rams. Seems like a period of male-bonding is necessary for mental contentment. But alas, this comradery is short-lived and the communalization step must be repeated every time a member is removed and returned.

A ram’s instincts run strong, respect him for that; but never, ever trust a ram.

I’m experiencing withdrawal…

The past week or so of unseasonably warm weather beckons me outdoors… to a multitude of gardening tasks. Primarily: clean-up, raking, weeding, turning compost, transplanting/pruning, and on and on! I’m exhausted just thinking about it – and the old bones are feeling it!

That leaves little time for creating (and I desperately need to create!). Well, besides creating gardening plans, that is! I try to keep a level head, focused, prioritizing a To-Do list and most importantly, taking little bites! After all, it’s the tortoise that won the race! For me, it’s a matter of perspective… knowing that there will ALWAYS be something to-do on a list somewhere!!

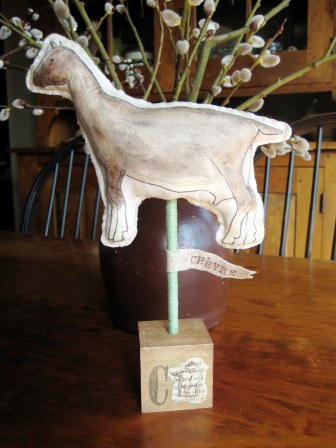
In the meantime, I managed to make a little Frenchy dairy goat – in all fairness – long overdue, considering all the sheepies that are foremost on my mind!

She stands proudly looking about curiously, as most goats do!

You could make your very own dairy goat ‘topiary’ too!

How-To: First, draw a dairy goat (had to be recently freshened, that is, have an udder – heehee) on a piece of muslin – remember, front & back! If you’re not great at ‘drawing’, there’s many goat diagrams available in goat books, etc that you could use for a pattern/trace. Next, I sewed the two pieces together and stuffed it (leave an inch or so opening to ‘stuff’) with fiberfil (and some dried fragrant herbs?). I then painted my goat with acrylic paint – here’s where you can get creative… because there are many colors/patterns of dairy goats… or, paint it to resemble your own goat!

I applied a fine coat of mod podge & tinted wax, and used a wooden dowel for a base (but you could use a natural tree branch too). I wrapped my dowel in a spring green butcher’s twine, but you could paint it, leave it natural, or wrap in ribbon, yarn, etc.

For the base, I recycled a vintage child’s alphabet block by drilling a hole in the top to accept the dowel. Any ‘base’ would do – be creative! I stamped the letter ‘C’ for chevre (goat in French) and a paper image of a goat onto the block. Last, I added a fabric scrap ‘banner’ with ‘chevre’ stamped onto it.

Similarly,

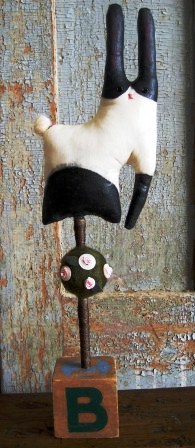
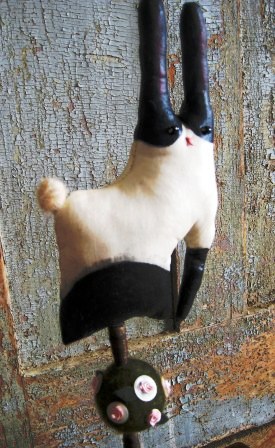
I also made a spring-tyme bunny. I added a wooly tail, seed beads for eyes, embroidery floss nose/mouth and needle-felted the topiary wooly green ball around the dowel. (The dowel is wrapped with ribbon.) I stitched on a few randomly placed vintage mother-of-pearl buttons and glued a pink ribbon rose atop each button.

Well… got to go… daylight’s burning… and the great outdoors is calling!

A new banner pic for my facebook page…

UGH!!! Burlap! It’s so very popular right now…and expensive! I mean, really??? It’s just burlap! Folks are using it for so many crafts: scrapbooking projects, upholstery make-overs, pillows and banners/pennants!

I love the ‘lOOk’ of natural burlap, but let me tell ‘ya, I hate sewing with it! It’s not easy to work with and frays way too easily!

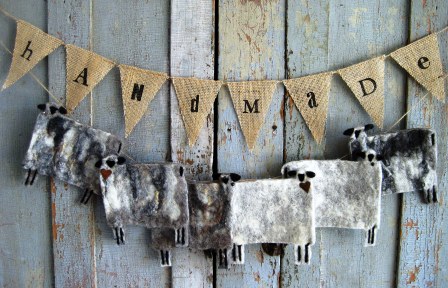
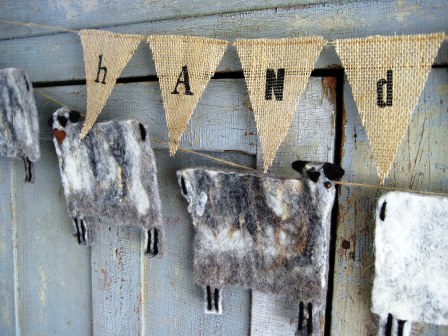
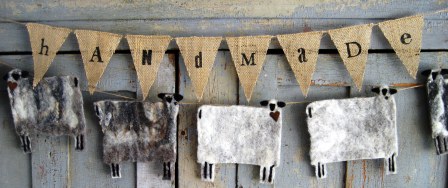
But, in spite of my objections, I quickly made-up the little ‘handmade’ pennant banner yesterday morning before I headed out for the day.

HOW-TO:

I drew a pennant template as my pattern and cut-out eight pennants (to spell the word ‘handmade’). Next, I applied a fine bead of ‘fray-check’ to two sides of each pennant to minimize any fraying! You could sew the raw edges as another option. I cut a length of jute garden twine and used fabric glue to attach each pennant to the twine.

With my cheap-o foam stamp letters, I applied a small amount of black acrylic paint to each letter with a paint brush, and one-by-one, stamped each letter to the burlap pennant. You could use an ink-stamp pad instead of paint or simply paint letters by hand.

You could ‘dress-up’ the banner with glitter, buttons and more. I was going for simple, more-is-less. I wanted my felted sheepies to be the main attraction, so to speak.

Hanging banners side-by-side, I thought this might be a sweet ewe-nique banner/header for my Sheepy Hollow page on Facebook. Just like the one-of-a-kind folk art I have the pleasure of creating!

Happy day! Happy Spring!

Much ado about garden mulch!

Mulch is a garden must for me; it helps control weeds, maintains soil moisture, stabilizes soil temperature and the organic types promote microbial activity in the soil. Added value:  it generally makes the garden look better! I don’t use mulch in ALL my garden areas, but in several gardens for different reasons.

Photo courtesy goodlifegarden.ucdavis.edu

BUT, if mulch is used improperly in the garden, it can be catastrophic…

Mulch is any natural OR synthetic material spread over the surface of soil in the garden or home landscape. Mulch may be utilitarian and/or decorative. In any case, the benefits of mulch include:

  • reducing soil moisture evaporation
  • ensuring a more even soil moisture supply
  • reducing or preventing weed growth (this is a biggie!)
  • insulating soil from extreme temperature changes (during winter)
  • preventing mud from splashing on crop surfaces thereby reducing ‘disease’
  • reducing fruit rot in melons, strawberries, and tomatoes
  • reducing soil crusting, erosion & compaction
  • improving neatness of the garden or landscape

Organic mulches like grass clippings or compost may also serve as a slow-release source of nutrients for plant growth. Consequently, earthworms feeding on organic mulches will enrich the soil with their castings and also help to aerate the soil. Organic mulches may, however, encourage some pests like sow bugs, snails, and slugs. Avoid thick layers of organic mulches, around fruit trees (and several inches away from trunk) which may shelter rodents. HINT: Minimize mulch near building foundations to reduce insect activity.

Don’t do this!

Mulch Effects on Soil Temperature

The time of year to apply a mulch depends on the type of mulch you wish to apply and your objectives. Clear and black plastic mulches can be applied early in the spring to vegetable gardens to warm the soil before planting. Black plastics are often preferred, as they will exclude light and discourage weed growth. Clear plastics are occasionally used to warm soils more rapidly and to solar-sterilize soils in the summer to kill weed seeds and disease organisms (and ‘beneficials’ too!!) before planting.

When using natural mulch in veggie gardens, they’re usually applied in the spring after the soil has warmed-up. Otherwise, the soil may remain cold longer and slow down plant growth. If growing veggies from transplants, apply mulch sparingly initially until plants develop good root system. Applying natural organic mulches and white plastic in the summer will help to cool soils. This is important for crops like strawberries, which do not tolerate extreme heat.

In the fall, applying natural organic mulches in the garden before cold weather will help insulate the soil and extend the growing season. Potatoes, carrots, and parsnips can be stored in the ground during the fall and winter using a straw mulch to keep the soil from freezing. Straw placed around blackberry canes in the fall will help reduce winter kill problems.

Various rock mulches can be combined with underlying perforated plastics or landscape fabric (weed barrier) and is used commonly in large landscape planting beds. Reflected light from white rock under windows with western and southern exposures will help warm your house in the winter. Dark colored rock will retain heat in the landscape and may offer some frost protection (reradiated heat).

Applying Mulch

Most coarse, natural organic mulches like straw, bark, and wood chips should be applied 2-3 inches deep over the whole area to be mulched. Grass clippings (no more than 1-inch depth)  should be allowed to dry out before applying them as a mulch to keep them from matting. Woody material should not be incorporated into the soil, as it will tend to tie up nitrogen in the soil making it unavailable for plant uptake. (Nitrogen in a basic nutrient for healthy plant growth.) Do not allow moist organic mulches to come directly in contact with seedlings as they may cause seedling disease problems like “damping-off.” Mulches are generally applied to most crops after they have emerged or around transplants.

Plastic mulches should be perforated to allow air and water movement into the soil. Holes cut in unperforated plastic for vegetable transplants should be large enough to accommodate air and water movement around the bases of the plants.

photo courtesy http://earthtechor.com/articles/?p=52

Types of Mulches

The selection of a mulch will depend on its availability, cost, the crop to be mulched, and the season of the year. Almost any material that insulates well yet permits gaseous exchange and moisture penetration will make satisfactory mulch. Good mulch should not need frequent renewal and should be non-toxic to plants, easy to apply, free from disease and weed seed, and not be so absorbent that it can take moisture away from plants. It should not pack, blow, wash, ferment, or burn easily. Check with your local university or agricultural extension office for best recommendations in your area!

Natural Materials

Bark/wood chips – Bark offers outstanding effectiveness and appearance. As it decomposes, its high carbon content may cause nitrogen deficiency in plants.

Coffee grounds – This material has rich color and is high in nitrogen and some trace elements.

Compost – Use finished (well-cured) compost by itself, under other mulches or mixed with soil before planting.

Corn cobs – Medium ground cobs; additional nitrogen may be necessary if corn cobs are mixed with soil.

Cornstalks – Cornstalks are very good shredded, or as whole stalks laid over other mulches in vegetable gardens. They are good for winter mulch.

Cover crop – Any crop, preferably a legume (to fix nitrogen), that can be grown on spare land and cut, can be used for mulch.

Grass clippings – Grass will mat and ferment if used fresh in a thick layer – not allowing water to permeate and air circulation. Use dry grass clippings and in a thin layer (no more than 1-inch). It is better mixed with other dry mulches. Do not use clippings if lawn has been treated with herbicides.

Gravel, marble chips, crushed stone – Pea gravel or larger can be used over a weed barrier or alone. These mulches tend to warm the soil, so use them for heat-loving plants. Do not use marble around acid-soil loving plants.

Hay and field grass – Hay and field grass should be mowed before it goes to seed. Legume hays are rich in nitrogen. Loose hay will blow in wind and these mulches can carry weed seed.

Leafmold – This mulch is best placed around shrubs and on bare plots as leaves fall. Shred the leaves to keep them from packing.

Manure – Use well-rotted and strawy manure for best results, and watch out for weed seed. Use manure sparingly on vegetable gardens, roses, and other plants. Fresh manure can burn tender roots and can smell during the first couple of days after application.

Pine needles – Pine needles are a very good mulch, especially for acid-soil-loving plants (such as strawberries). Pine needles are light, airy, and attractive but can be a fire hazard.

Straw – This is a good general mulch used for winter protection and on paths between vegetable rows, but it may carry weed seed.

Synthetic Mulches

Cloth – Burlap is sometimes used between rows in vegetable gardens.

Newspaper – Use three to six sheets thick and cover it with organic mulches for better appearance and to speed decomposition.

Plastic film – These mulches are unattractive alone. For best results, plastic should be well perforated to allow aeration and moisture penetration. Clear plastic warms soil but permits weed growth, whereas black plastic warms soil and deters weed growth. White plastic cools soils and deters weed. Other colors are available and have various effects on plants.

Woven weed barrier – This mulch allows moisture and oxygen to penetrate the soil, encouraging roots to penetrate more deeply. Use it in landscaping as a substitute for black plastic. It deters weed growth.

Resources: MSU Extension & NMSU: Mulches for Gardens and Landscapes.

Happy gardening!

Taking advantage… of the weather.

Like many of you, I’ve been taking advantage of the unusual Spring-like weather. For the past several days, I’ve been working in my garden, raking, pruning, thinning plants and overall clean-up. Oh boy, I can feel those achy muscles I forgot I had!

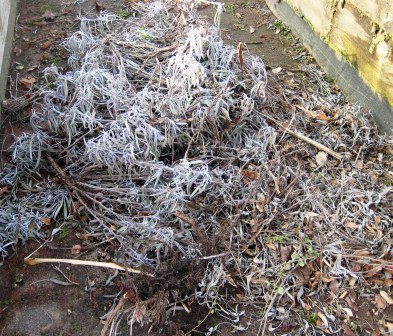
Here’s the trimmings from my sage and Greek oregano plants! Don’t be shy to clean-up those woody stems of sage and cut back the runners from the oregano!

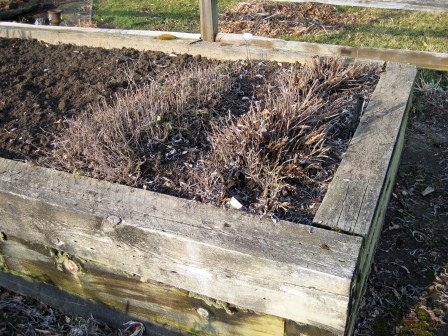
My trimmed Greek oregano and sage, neat and tidy.

I’m anxious to get a few seeds into the ground: a mix of salad greens, spinach, radish, leeks – basically, many of the cold weather crops. Do you know the website SproutRobot?  It will help you to plan your garden and advise you when you should start seeds indoors or plant directly outdoors. Pretty cool!

If you’re planning a veggie garden this Spring, don’t take shortcuts and neglect your soil. Remember – SOIL is the building block for all life! Soil is composed of: organic matter, clay, silt, fine sand & coarse sand. The organic matter contains the NUTRIENTS and improves any kind of soil texture!

Begin preparing your garden by amending the soil with organic matter. While you may purchase soil amendments, I prefer to use my own home-made compost!

Did you know…? When you use fertilizer, do you know what those three numbers, side-by-side tells you? The numbers tell you the amount of nutrients to be had — N-P-K — N is for nitrogen, produces green leaves & ‘above-ground’ growth. P is phosphorus (the second number) helps plants bloom flowers and make fruit or, root growth and flower development. Last, K is the third number, potassium, overall plant vigor, stress resistance, stem strength. Simply put (and easy to remember) N-P-K, above, below and all-around…. generally! (I used to ‘teach’ junior master gardeners). 🙂

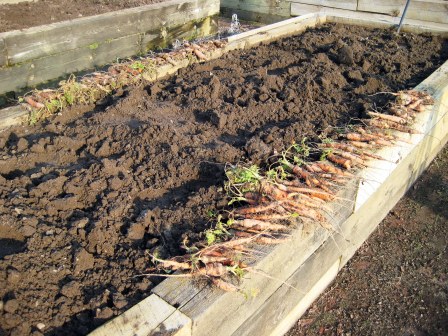
Now, back to my photo. First, I harvested the rest of the carrots that over-wintered. We always plant lots of carrots for all the critters! Then, added lots of compost & double-dig – to aerate the soil & mix well… removing any debris. I found lots of worm (that’s good) and only one grub (that’s bad).

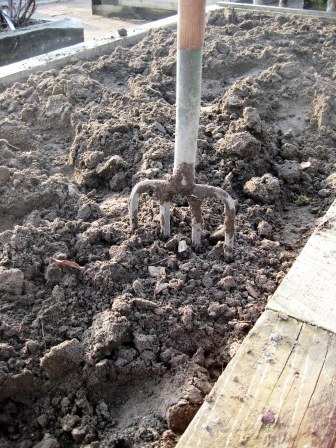
My favorite garden tool – a garden fork! I use it to break up the soil, dividing & transplanting plants and finally, harvesting potatoes!

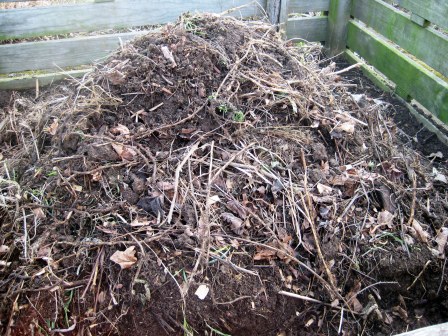
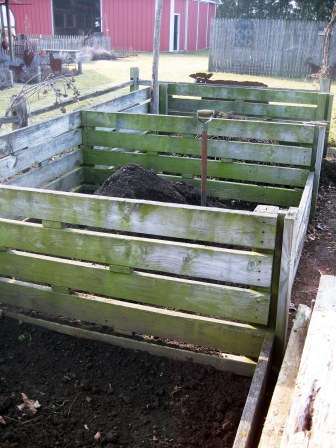
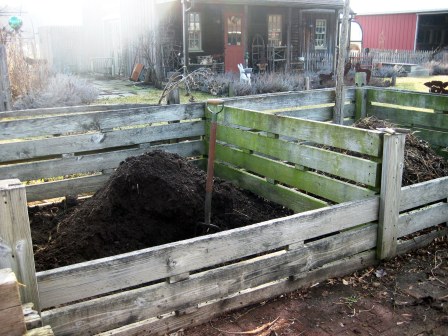
This is my ‘BEFORE’ compost. We use three-stage compost bins: one bin for  accumulating garden debris, one that’s in-process, and the third bin, for finished compost. Plant waste goes into the bin throughout the growing season. Late Fall, The Big D, normally processes the garden waste through his chipper/shredder (that operates off his tractor PTO) to reduce the particle size, increasing surface area and accelerating decomposition! It’s much easier to turn-over (to aerate) the pile, when it’s well-mulched!

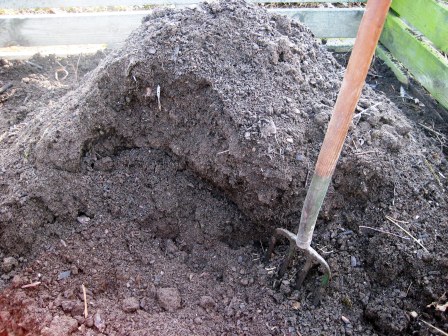
This is my finished compost: rich, black gold that’s  full of valuable nutrients for healthy growth of the garden plants. Depending on it’s use, I may screen it, but more often, I just add it direct to the garden… tossing out the stone or stick.

You can see my 3-stage compost bin…the empty bin, when not in use, provides space for additional plants.

Composting is a must-do, if you have a garden!

Finally, I’ll rake out the bed nice and level and it’s ready for planting!

Happy gardening!

Spring Fling: Espalier

“Fling” – defined as a brief casual relationship (often with sexual connotations). But, the truth of the matter is, that I’ve fallen head over heals… in love… with  espalier (pronounced /ɨˈspælɪər/ or /ɨˈspæli.eɪ/)! There, I admitted it!

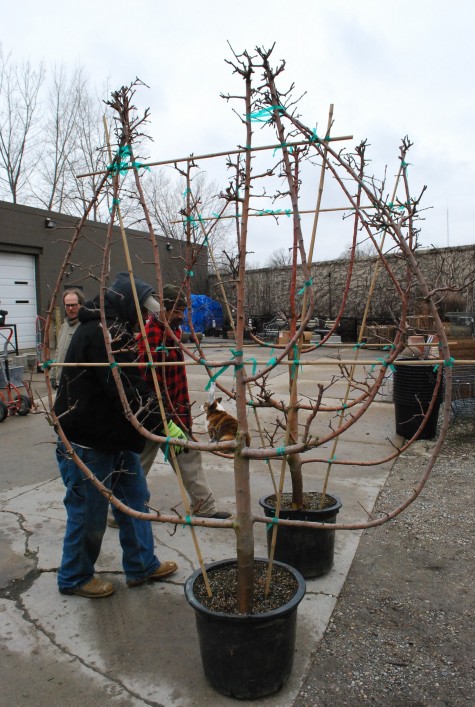
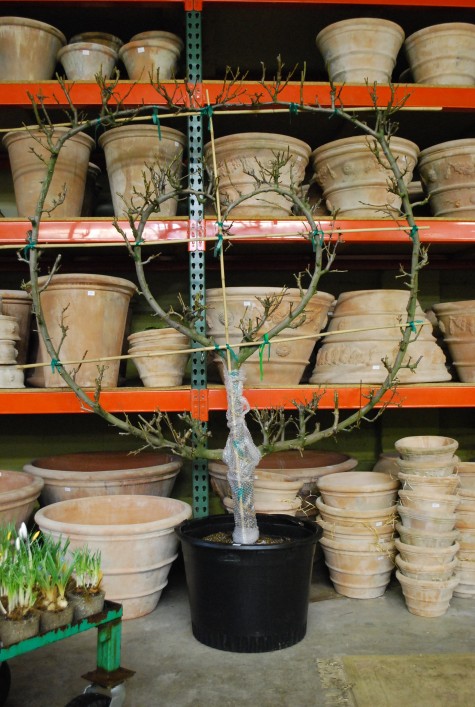
photo credit Detroit Garden Works

Think of a topiary form… but, on a MUCH MUCH larger scale! Espalier is the horticultural and ancient agricultural practice of controlling woody plant growth by pruning and tying branches so that they grow into a flat plane, frequently in formal patterns, against a structure such as a wall, fence, or trellis.

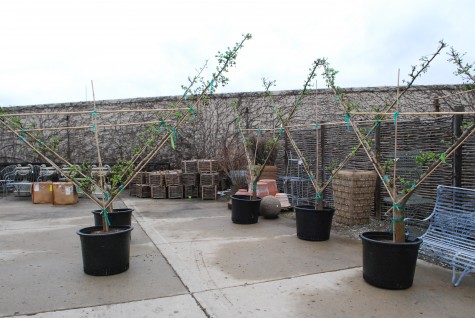
photo credit Detroit garden Works

Fruit trees are often ‘trained’ as espaliers, decorative fans, or cordons consisting of a central stem and a number of paired horizontal branches all trained in the same plane. The most important advantage is that of being able to increase the growth of a branch by training it vertically. Later, you can decrease growth while increasing fruit production by training it horizontally.

Espalier, trained into flat two-dimensional forms are ideal not only for decorative purposes, but also for gardens in which space is limited. In a temperate climate, they may be planted next to a wall that can reflect more sunlight and retain heat overnight.  Or, they may be planted so that they absorb maximum sunlight by training them parallel to the equator. These two facts allow the season to be extended so that fruit mature over a longer period.

Whimsical heart-shaped espalier – courtesy Detroit Garden Works

Most fruit trees trained as espaliers need pruning in summer and winter to re-create their shape and yield the best fruit. Winter pruning performed while the tree is dormant, will stimulate lateral growth of the espalier tiers, resulting in vigorous new growth in the following spring. Vertical growth pruned in the summer helps to create fruiting spurs. Pruning must be performed regularly or the ‘espaliered’ form would soon be lost!

Our little sneak get-away the other day (my ‘Big D’ was working from home the past few days) to the Detroit Garden Works in Sylvan Lake, Michigan… always provides home garden inspiration! From Old World charm…fountains, staddle stones, iron-works, statuary…


…to seasonal favorites!

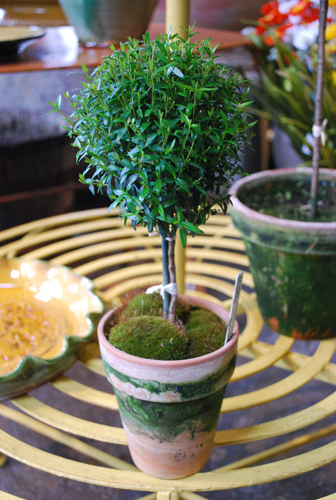
myrtle topiary – Detroit Garden Works

Perhaps not suitable for everyone’s pocketbook… a ‘mature’ espalier specimen will set you back hundreds of dollars!! However, after a bit more research, I plan to purchase a few starter fruit trees from a local nursery – to whittle away – into an espalier of my very own!!!

Happy gardening!


The Frugal Goat

I love goats, but you already know that about me! What better way to spread the goat-love, than to ‘teach’ youth? While I don’t consider myself a goat expert, I’m more than happy to share my knowledge (with my daughter’s help, naturally) as a 4-H Goat Project Leader .

The goat kit/resources I HAVE used in past years was no longer ‘available’ and our MSU Macomb County Extension Office does not own a similar goat kit. The one I like/have used is this one from Ohio at a grand spanking cost of $459 !! YIKES! Well, that’s not going to happen…

So, I’m making my own… pulling together a number of resources from the web, library, my personal resources, CD’s, etc.

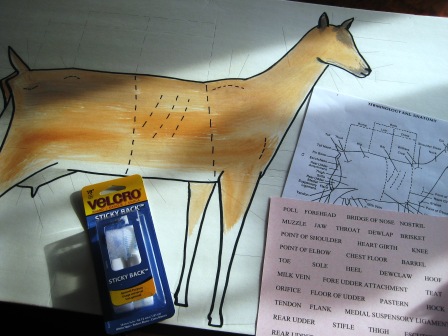
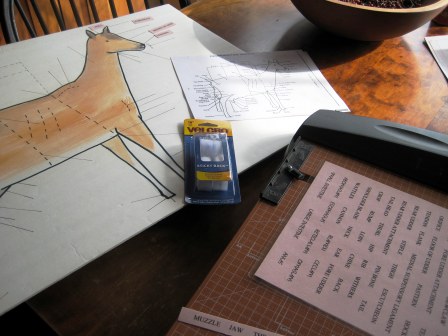
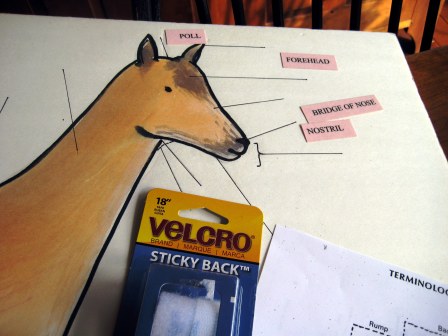
So, I also purchased a rigid foam poster board and sketched a dairy goat, identifying dairy goat anatomy and added a bit of color. I typed, printed and laminated the body parts and will attach velcro to the board and body part labels.

I think this will be a lot of fun and valuable resource for my goat kids.

…and at a fraction of the cost.

I’d like to sketch a skeletal structure on the back of this poster and probably an ‘overlay’ of the ruminant digestive system! Perhaps, the kids would like to actually take on that project – as part of the learning process???